A vacuum pump is a device that removes gas, air, and water from within a closed system. As it removes more of these substances, the pressure within the closed system increases, creating a stronger vacuum force (absence of air).
Think of a glass of soda inside a closed system. Soda has carbon dioxide added to it. As the air from within is removed, it reduces the outside pressure around the soda, creating the gas inside of it to expand. When the vacuum pump is turned off, the soda goes back to its present state.
An air compressor uses the air that is stored inside of a tank and uses it for devices powered by air, such as nail guns, sanders, and paint sprayers. A vacuum pump removes the air within a sealed area to create a low level of pressure.
The lower the pressure, the higher the rate of vacuum within the sealed area. This is then used in applications such as suctioning, dry etching and is even used in the automobile industry for powering door locks.
Vacuum pump uses
Vacuum pumps are used in many applications.
Medical processes, such as suctioning devices and machines used in surgical procedures
Refrigeration to remove moisture and air
Air conditioning systems remove contaminants before they are charged with a substance that absorbs heat, which allows for the cooling process
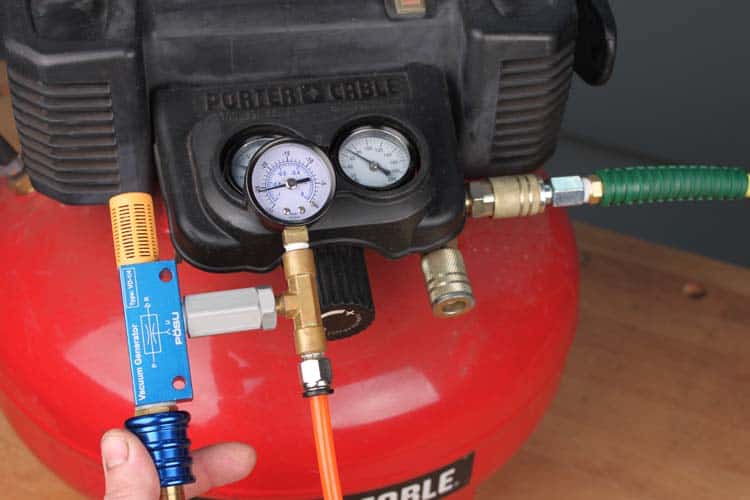
How To Make A Vacuum Pump With An Air Compressor
Both an air compressor and a vacuum pump have similarities and differences, and it would be relatively easy to form a vacuum pump with the use of an air compressor.
Differences between a Vacuum Pump and an Air Compressor
Storage-An air compressor needs a tank to store compressed air, vacuum pumps do not.
Vacuum Strength-A vacuum pump’s strength is calculated by the amount of pressure it expels. An air compressor’s strength is measured by the amount of air that can be produced and at what force.
Flow Rate-The rate of flow is calculated depending on the pressure of the vacuum pump, whereas the calculated rate of flow from an air compressor depends on its volume of air produced at a certain pressure level.
Power Usage-Vacuum pumps use less energy than air compressors when compared at the same rate of compatibility.
It’s a good idea to familiarize yourself with the manual for the air compressor before attempting this project. If you don’t own a small air compressor, second-hand ones are usually available online or in thrift shops.
One thing to keep in mind; the valve seals are not designed with a tight seal in air compressors as they are in a vacuum pump, therefore it should be expected that using the compressor in this way may account for an improper rate of flow and oil loss.
You will need to open the case which encloses the motor and pump of the air compressor.
The end cap should be easy to remove, along with a few screws. Once the screws have been taken out, you may have to pry the case open as some manufacturers use glue as well.
Now that the case is open, you will find a motor, a pump, and a couple of wheels (gears). The gears are components that rotate and transmit power.
Next, you will need to locate the cylinder and find the air intake. You may have to turn the motor and pump around to locate it. (The manual will come in handy for this part, you can also download manuals online for most makes and models).
The top of the cylinder has holes, and you will need to clean around these with rubbing alcohol to remove any traces of oil and debris before filling these using high-temperature metal-epoxy or JB Weld. Once the glue sets, it’s a good idea to mold it into a circular wall around the base of the holes so the hose barb will have extra support. Once the support wall has been set, it’s time to add the hose barb. (A hose barb can be found at most hardware stores and are parts used to secure hoses and tubing.) Attach this part with additional epoxy, adding more around the base, and leave it to set at least 24 hours. Once the 24 hours have passed, it’s time to add the hose.
You may have to work it back and forth before fitting properly. I recommend using a hose clamp for extra security, but it’s unnecessary if the hose you are using is flexible. Once the vacuum is running, it will suction the hose to the barb, making a tighter seal.
Once these steps are completed, it’s time to put everything back together, but first, you will need to cut a hole approximately the diameter of the hose in order to push it through the case. This can be obtained with the use of pliers. Pass the hose through the hole, closing the case and securing it with screws, putting the end cap back in place. Your vacuum pump is now complete and ready to use.
Wide application of uses including medical and food
Final Thoughts
When certain items are modified, there is a chance that they will not function as well as manufactured ones. Be sure to check for air leaks, and when using your homemade vacuum pump, be careful not to run for too long so it doesn’t overheat.