Air compressors can make light work of what we sometimes consider long and tedious tasks. Imagine painting a house or a fence with a paintbrush when you could use an air compressor and be done in less than one-quarter of the time.
The utilization of air compressors has been around since the last part of the 1700s with the principal patent in 1829.
They have progressed significantly from that point forward and are proven to facilitate the many needs of individuals, both commercially and for residential use.
With so many brands on the market, it can become difficult when deciding which one to choose.
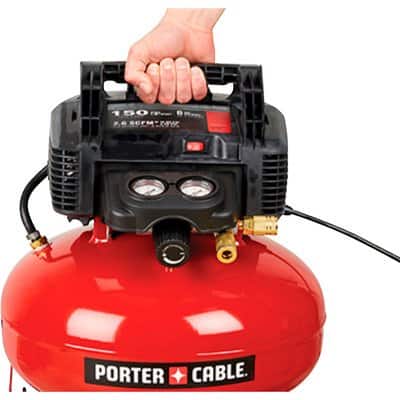
Porter-Cable is a well-known brand of air compressors established in 1906, becoming popular in 1926 when they began designing electric power tools. Many years later, they are still a popular brand of tools for home and industrial use.
Air compressors come in many variations. Porter-Cable is available in stationary, portable, handheld, oil-free, and oil lubricated.
Using these air compressors is quite easy, but it’s always a good idea to familiarize yourself with the manual before attempting to use these machines.
Although most air compressors work with the same principles, there may be alternate recommendations and guidelines for each brand.
Correctly using these machines will not only ensure your safety and warranty (1-3 years) but will also aid in prolonging the lifespan of your air compressor.
If you’re new to using air compressors, read on, as this article describes how to use a Porter Cable air compressor.
Prepare
Before using your Porter Cable air compressor, it’s a good idea to prepare your workstation beforehand with a few items.
Air compressor hose-to allow the air from the tank to power your air tool
Safety glasses-to prevent debris from entering your eyes
Vicinity of electrical outlet-to power the air compressor
Adjustable wrench-to connect the air hose to the air compressor
Plumber’s tape-if not using quick connect couplers
Set-Up Steps
Step 1: Position the air compressor on a stable surface. Make sure the unit is turned to the off position before plugging it in. Plugin the power cord to the nearest electrical outlet.
If your model is oil lubricated, you will need to check the oil level before proceeding and fill to the specified mark. You can check the manual if you are not sure about the instructions
Step 2: Locate the drain valve on the bottom of the tank and ensure that it is set to the closed position
Step 3: Place the switch to the on position, allowing it to run. (It’s important to know that some air compressors can be quite noisy when the tank is filling.) The compressor will stop running when it reaches its full pressure capacity.
If the compressor does not stop when it reaches full capacity, a safety valve located next to the regulator will pop out and release the air from the tank
Step 4: Connect the air hose to your air compressor using an adjustable wrench
Step 5: Connect the proper tool for your job to the opposite end of the air hose by pulling back on the coupler, inserting the tool, and releasing the coupler back into place (you will have to repeat these steps when removing or changing tools)
If you are not utilizing quick connect couplers, the connections between the end of the hose and the tool you are using need to be made airtight with plumbers tape or putty.
Tips
It is recommended to drain moisture from the air compressor by removing the valve on the bottom of the tank after use. Replace the valve afterward.
These machines exert significant amounts of pressure, so be sure to take caution when disconnecting the hose and tools.
Troubleshooting
Vibrating-be sure there are no loose parts and tighten if needed.
Sporadic pressure increasing/decreasing-check for broken valves, dirty filters, and loose belts, like these, can all cause a slow pressure increase. Check for water in the reservoir for increasing pressure buildup.
Noisy when in use check for loose parts which may rattle, ensure oil levels are at a proper level if applicable.
Air compressor won’t start-check electrical outlet, oil level if applicable, check on the pressure switch, and replace if necessary.
The Best Options Of A Porter Cable Air Compressor
Porter-Cable has many air compressor options with each one working optimally based upon your needs. Here are two of the best recommendations.